UseOCL
“USE (OCL) is a system for the specification and validation of Information Systems based on a subset of the Unified Modeling Language (UML) and the Object Constraint Language (OCL).”
Installation
Installing USE is rather easy:
download the use zip file (web).
extract this zip file where you want to install it (e.g. %SCRIBESTOOLS% on windows).
rename the newly created directory to
%SCRIBESTOOLS%\UseOCL.for convenience add the
bindirectory to your system PATH. For instance the PATH could look like:%SCRIBESTOOLS%\UseOCL\bin; ... # Windows. ; is the separator /home/pablo/UseOCL/bin: ... # Unix. : is the separator
Launching USE OCL
Once installed, you can just type the following command in a new shell:
use -nogui
If the bin directory is not in the PATH, then you have type the full path to use binary). This launch the USE OCL Command Line Interface (CLI).
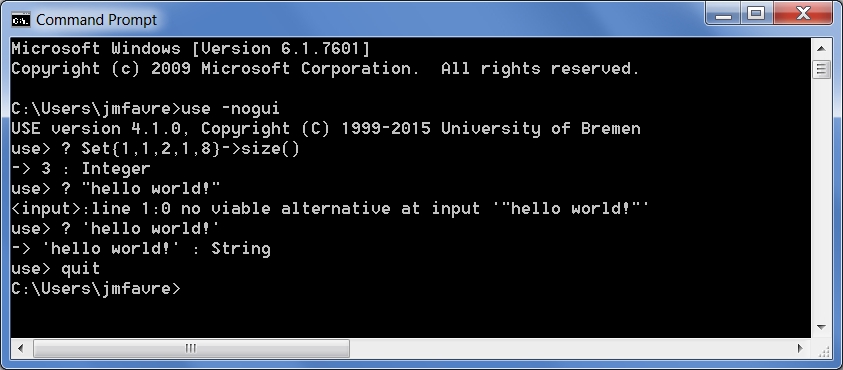
A session with the Command Line Interface. Use is started and then some OCL expression are evaluated with the ? command.
Warning
On Windows, if you want to use cygwin, then type use.bat -nogui
otherwise you may encounter problem with the use script.
Warning
On Windows, you might see the following warning message that start
with WARNING: Could not ... Software\JavaSoft\Prefs and ends
with Windows RegCreateKeyEx(...) returned error code 5..
In this case in administrator mode one should create the key
HKEY_LOCAL_MACHINE\Software\JavaSoft\Prefs with regedit.
This is just a warning and you can use USE OCL safely interactively.
This might although cause problems if you use USE OCL via
some scripts as the command will always return an error code.
Warning
If you get the following warning when starting USE OCL then
use the option -nr.
java.lang.UnsatisfiedLinkError: no natGNUReadline in java.library.path
If you want you can also have a look at the graphical interface (in this case just type:
use
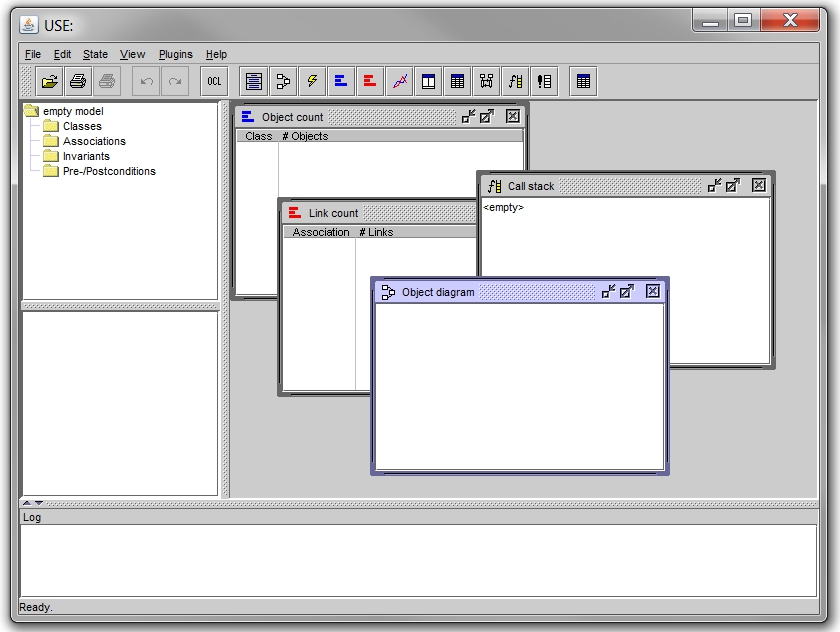
The Graphical User Interface.
Documentation
There is quite some documentation for USE OCL. We recommend the following order:
Two “cheat sheets” are provided in one file (
local):On one page, the OCL language is described according to the standard.
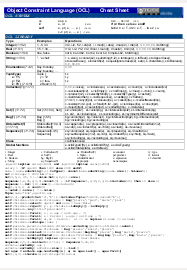
On the other page, the languages of the USE environment are described: (1) the specification language (
.use) which includes OCL, but also (2) the action language (.soil).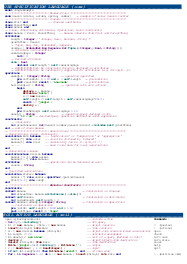
The “cheat sheets” just describe the language. To understand how USE can be used read first the quick tour (
local, web). A MUST READ. A simple class model with 3 classes, 3 associations and 4 OCL invariants.Watch then the video (
local, web). The first part (until frame 128/208) deals with the static part and invariants. The second part deals with dynamics, operation simulation and pre/post conditions. You may be interested only by the first part or by both parts.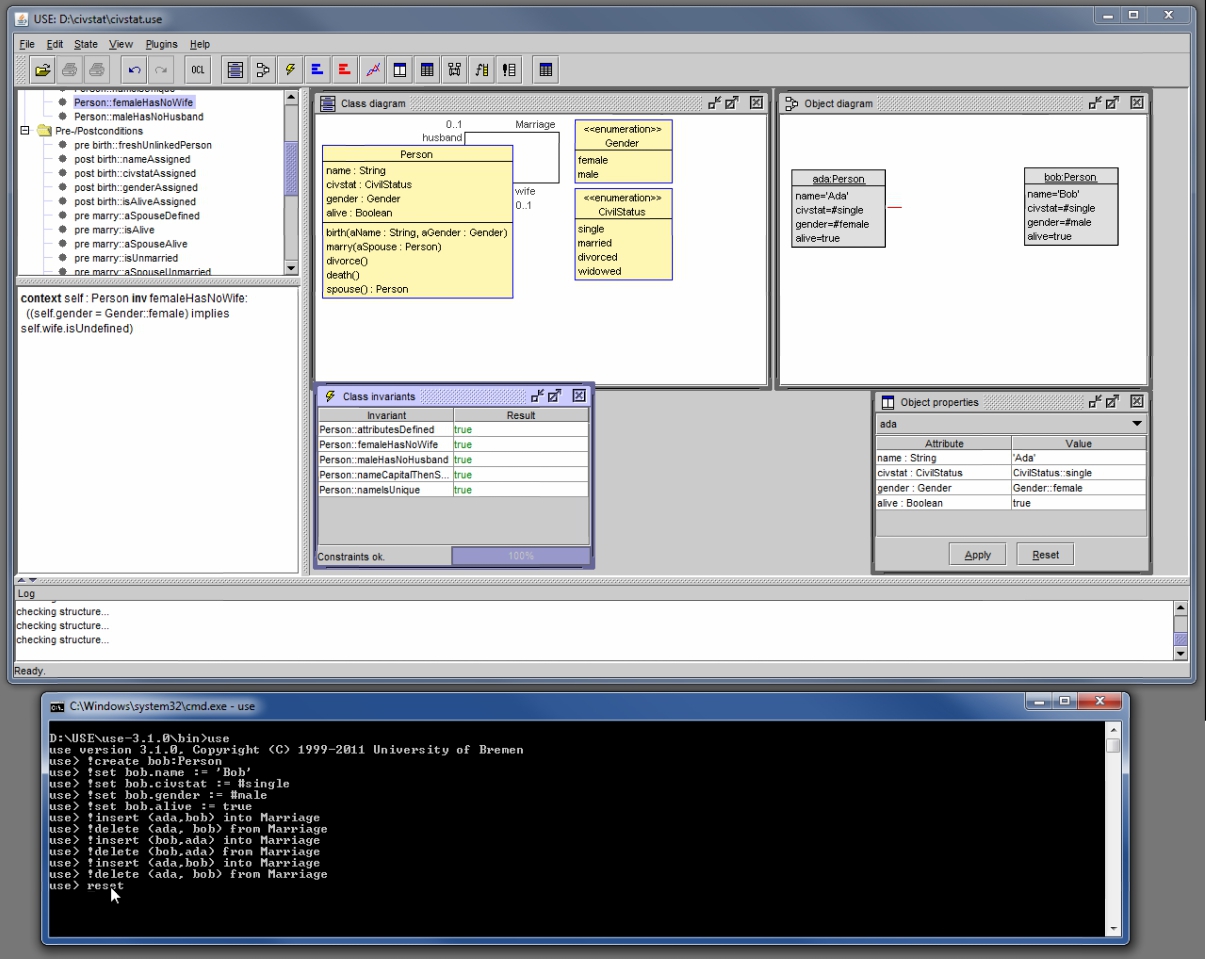
If necessary use the reference documentation (
local, web). Use this document as a reference, for instance to check something about USE OCL language. Note that chapter 6 (page 82) contains the list of OCL operations supported by OCL USE.Note
This documentation has not evolved for quite some time. More features have been added to USE OCL, in particular to follow the evolution of OCL/UML or to remove some limitations. For instance support for qualified associations is possible although undocumented. Use the cheat sheet for updated information. If needed the directory
examplesand/ortestof the distribution contains also some examples demonstrating the use of these features. For instance various qualified association examples are visible in thetest/t086.use.
Attention
The documentation and the video show both the Command Line Interface (CLI)
and the Graphical User Interface (GUI). You might be however interested
only by the CLI (in particular in the context of automation and
integration with other tools). In this case, use the following option when
launching USE OCL (don’t forget -nr if you get a warning):
use -nogui
Syntax
The syntax of OCL and USE/SOIL languages is summarized in (local).
Only particular points are exemplified below.
Classes
Classes can be defined as following:
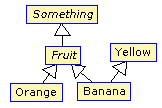
class Yellow
end

abstract class Something
end

abstract class Fruit < Something
end

class Banana < Fruit, Yellow
end
UML:
Attributes
class Banana
attributes
    length : Integer /* Integer, Real, Boolean, String */
    growthTime : Season
    -- Tuple, Bag, Set, OrderedSet, Sequence
    goodies : OrderedSet(Bag(Sequence(Set(Tuple(x:Integer,y:Real,z:String)))))

    remainingDays : Integer
        init: 42                           -- attribute initialization
        derived: self.length * self.size   -- attribute derivation

end
Restriction form the standard
* No invariants directly declared on attributes
* No cardinality supported for attributes. For instance smoker : Boolean[0..1] is not supported.
Operations
class Banana
operations

    sleep()                        -- operation signature

    wakeUp(n : Integer):String     -- operation specification
        pre notTooMuch: n > 10 and n < self.length     -- precondition
        post resultOK: result > 'anaconda'             -- pôstcondition

    helloJungle() : String         -- operation implementation (SOIL)
        begin
            declare x : Banana ;
            WriteLine('hello') ;
            x := new Banana ;
            self.length := self.length + self.remainingDays*20+3 ;
            result := 'jungle' ;
            destroy x ;
        end
        pre freshEnough: self.remainingDays > 10

    smash() : Integer               -- operation/query (OCL)
        = self.length + Set{4,2}->size*42
end
Associations
UML:

USE:
association Owns between
    Person [1] role owner
    Car[*] role ownedCars
                            -- more roles for n-ary association
end
An example of link:

SOIL:
! insert(tian,c232) into Owns
Association Classes
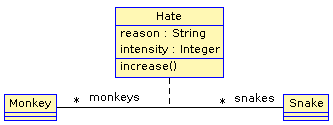
UML:
USE:
associationclass Hate between
    Monkey [*] role monkeys
    Snake [*] role snakes
attributes
    reason : String
    intensity : Integer
operations
    increase()
end
SOIL:
! c := new Hate between (chita,kaa)
! c.reason := "kaa is really mean"
! c.intensity = 1000
Qualified Associations
Let us consider this following qualified association.

Note the qualifier construct in the USE association definition:
association APourDirigeant between
    Association1901[*] role associationsDirigees  qualifier(titre:String)
    Person [0..1] role dirigeant
end
The example below represents a valid object model.

Note the insert(<role>{<value>...} SOIL construct
to create new link and .<role>[<value>] to traverse links:
! insert(petanque38{'president'},antonio) into APourDirigeant
! insert(petanque38{'secretaire'},antonio) into APourDirigeant
! insert(petanque38{'tresorier'},djamila) into APourDirigeant
? petanque38.dirigeant['president']
? petanque38.dirigeant
Creating diagrams
USE Graphical User Interface (GUI) can be used to create class diagrams as well as object diagrams (among other kind of diagrams).
In order to do so launch use without the -nogui option. If you
want to get both a class diagram and a object diagram specify both
a .use and .soil file on the command line. Something like:
use -nr CyberGarage.use scenarios/CyberGarage/scenario.use
To create a diagram then use the menus:
View > Create View > Class DiagramandView > Create View > Object Diagram
Many useful options are then available in the contextual menu of each diagram (right click).
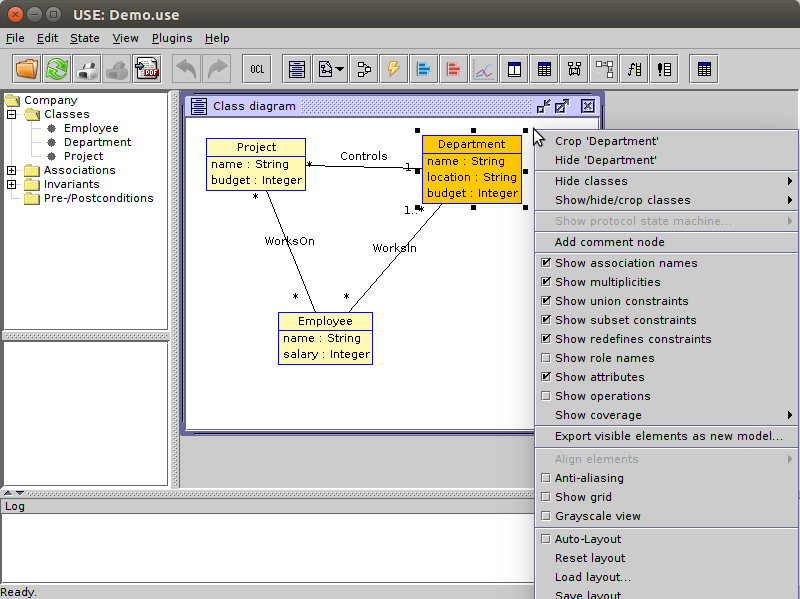
Many options are available. You are likely to use:
Auto-Layoutto get a first layout automatically. Don’t apply this option on an existing layout ...Save-Layoutto save the layout after some manual arrangement. This save the diagram layout in the form of a.clt(Class LayouT) file or.olt(Object Layout) file depending on the diagram. Quiting use without saving the current layount will create the file ‘...-default.clt’. It is a bad practice to use this file, especially when various diagrams are to be build. Save the layout in proper files with proper names.Show muliplicities,Show role names, etc.
If you intend to create various diagrams for the same model (to create
different views) you are likely to use Hide options.
Note
Naming objects
If you have trouble in getting what you want as object identifier
in the object diagram (you might get for instance Vehicule1 : Vehicule)
this is mostly due because no name have been assigned to yours objects.
In order to do so you have to use the following syntax:
v803 := new Vehicule('v803')
Note that the first occurence of v803 is a variable name (not display
in the diagram), while the second occurence is the object identifier displayed
in the diagram. If none is given, use will define one automatically.
Using PyCharm IDE
USE specifications are just plain text files. A regular file editor and a shell are just enough to work with USE.
You may however want to use syntax highlighting with PyCharm
(see PyCharm for installation instructions).
Read also Launching PyCharm. When you launch PyCharm select
the “project directory”, the top directory that contains
all your files including the .git subdirectory if you use git.
PyCharm has to be configured and this imply to follow various steps. A PyCharm plugin has to be installed and a few configurations files have to be copied. At the end you will get the following result.
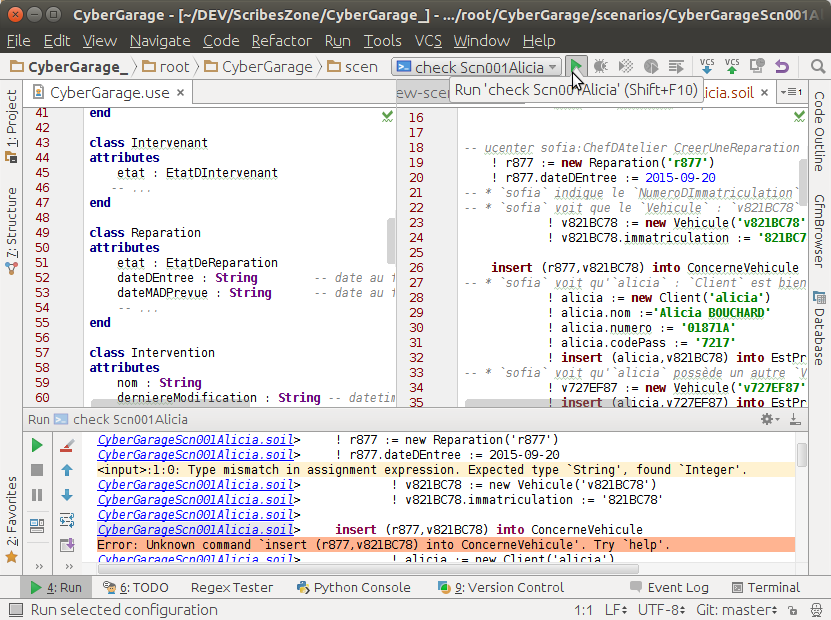
Using PyCharm for USE syntax and output highlighting
The figure shows the following elements:
- On the left a
.usespecification is “syntax-highlighted”. This is handy especially if the OCL language is used as they are many keywords and operations. - On the right a
.soilscenario is “syntax-highlighted”. This is handy since there is typically a lot of comments in such a scenario; the statments are much more visible in this way. - On the top bar, a button allows to check the scenario against the specification. There is no magic here, this button should be configured.
- On the bottom window, the output of USE is displayed with colors for errors. This is quite handy when the output is large.
The instructions below will allow you to get an environment as shown in the following picture. If you are just going to se USE OCL only once don’t waste your time. Use a regular editor. Otherwise your might consider following the procedure below.
USE and SOIL highlighting
PyCharm support syntax highlighing for many languages but not USE OCL. The file contains the definition of the language (keywords, comments, etc.).
- PyCharm should be stopped.
- Download (
UseOCL.xml). - Copy this file to
.PyCharm50/config/filetypes(create the directoryfiletypesif it does not exist already).
Note
The .PyCharm50 directory is used for global IDE settings. The number (e.g. 50)
vary according to the version of the product. This directory it is usually located
in your home directory (not on OS X). See IDE Settings for more information.
Start PyCharm. From now on, all .use, .soil and .con files should be colored.
If you are curious, the (UseOCL.xml) file has been produced using PyCharm feature to
define new file types.
Output highlighting
To get the output of USE OCL colored (to see the errors as shown in the figure above) three steps should be followed:
- Installing the Grep Console plugin
- Installing a configuration suitable for USE OCL
- Creating a “Run Configuration”
Installing Grep Console
In PyCharm go to File (menu) > Settings (menu) > Plugins (tab) > Browse Repositories (button).
Note
If you computer is behind a firewall you have to specify a proxy.
In this case select HTTP Proxy Settings > Manual Proxy Configuration and fill
the parameters. For instance at the UGA you will need to enter: HostName :
www-cache.ujf-grenoble.fr, Port Number : 3128
A list of plugins should be displayed. Type "Grep" in the search field and install
Grep Console.
Configuring Grep Console
The Grep Console plugin allows to associate colors to regular expressions matching program outputs.
Download the (GrepConsole.xml) file which defines a configuration suitable for USE outputs.
PyCharm should be stoped. Copy this file into the .PyCharm50/config/options directory (see above).
Override the existing file with the same name.
Creating a Run Configuration
Environments like PyCharm use Run Configuration to launch repetitive tasks.
PyCharm should be stopped. Copy the (checkScn001Razamanaz.xml) configuration in
the directory .idea/runConfigurations of your project (create the directory
runConfigurations if it does not exist already).
After starting PyCharm and selecting the menu Run > Edit the Configuration
you should see the following configuration:
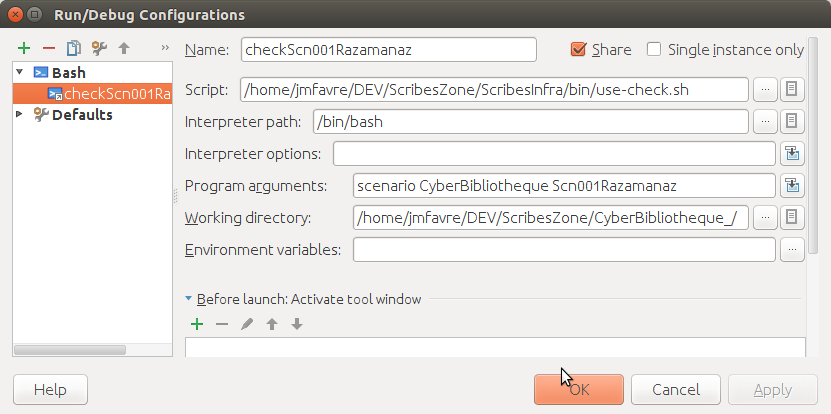
The checkScn001Razamanaz configuration parameters
Adjust this configuration where necessary.
At the time of writing this configuration refers to the ScribesInfra repository which must be clone at the same level.
Note
As an alternative to PyCharm, on Windows, you can use notepad++. A syntax file is available for OCL sources although it is not updated, do not support .soil files nor output highlighting.
To install this file:
- in Notepad++ go to “Main menu > Language > Define your language... > Import ...“
- select the file
USE_Notepad_plusplus_User_Defined_Language.xmlweb. - You may have to restart notepad++.